This tutorial was written in PSP X. You should be able to achieve similar results in other versions (however, the mask and gradient will only work in versions PSP8 and up). You may need to search for some of the effects in your PSP's dropdown lists or the Help window. Please do not offer any of the supplies for download anywhere, do not change file names, do not send the webpage through emails, and only offer a text link to the tutorial URL. I do not wish my tutorials to be translated. Thank you for your courtesy...God bless, Diana
Penta Garbage Collections Plugin
SUPPLIES:
Images; Mask & Gradient
Gabrielle and Island of Misfit Toys Fonts
More results with thanks to Ginny for testing for errors! HERE
~~~~~~~~~~
1) File/New: 750W x 500H, Raster Background, Transparent.
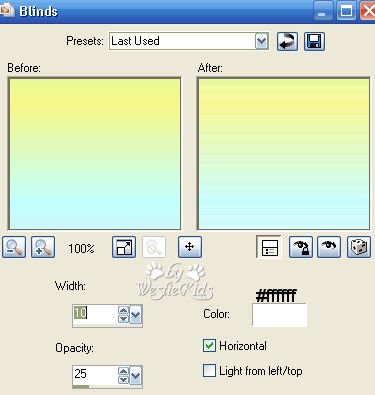
2) Effects/Texture Effects/Blinds, per screenshot:
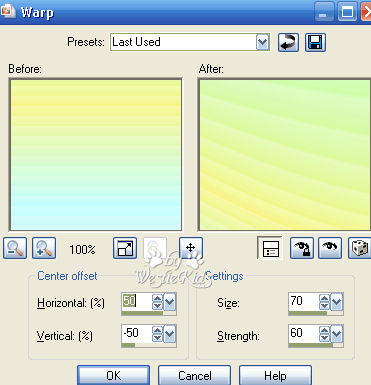
3) Effects/Distortion Effects/Warp, per screenshot:
4) Selections/Select All.
5) Open one of the .jpg tropical images supplied (my example at top of page is using wk_trop1.jpg).
Right click on your Layer in the Layer Palette and Merge/Merge Group.
6) Open one of the misted tubes supplied (my example at top of page is using wk_misted-george.pspimage).
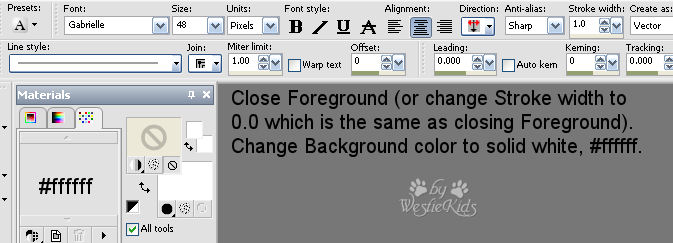
7) Open the Gabrielle font included in Supplies, close your Foreground and change background to #ffffff, white.
Move your text where you'd like and then right click on it in Layer Pallete and Convert to Raster Layer.
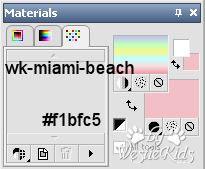
8) Open the Island of Misfit Toys font included in Supplies, Foreground still closed, and change Background color to #f1bfc5.
Move your text where you'd like and then right click on it in Layer Pallete and Convert to Raster Layer.
9) Selections/Select All.
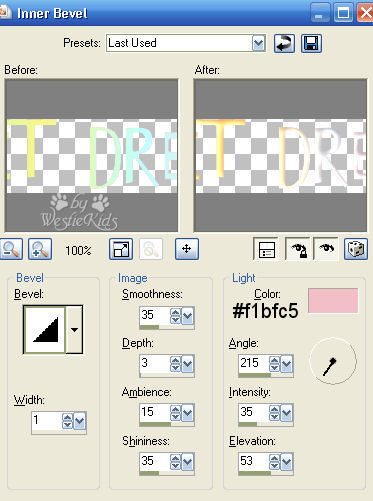
10) While text is still selected: Effects/3D Effects/Inner Bevel (see screenshot):
Effects/Plugins/penta.com/jeans: Amount: 62, Border Width: 4 (default values).
11) Effects/3D Effects/Drop Shadow: Vertical & Horizontal = 2, Opacity = 30, Blur = 5.00, Color = #000000.
I hope you have enjoyed this tutorial and perhaps learned a little something from it. If you would like to send me an email with your results, I would be delighted to see them. ..God bless, Diana
~~~~~~~~~~
DISCLAIMER: In accordance with Title 17 U.S.C. Section 107, any copyrighted work on this site is distributed under fair use without profit or payment to those who have expressed a prior interest in receiving the included information for non-profit research and educational or criticism purposes only. http://www.law.cornell.edu/uscode/17/107.shtml
Created 07/01/07
(NOTE: If a Language Pack Installation box pops up - just click CANCEL.
The Plugin icon and download link are in English. Create a folder named
Penta in your Plugins folder and extract garbage_collections.zip contents to it.
We'll use Jeans but there are other nice effects you might like):
(Mask and Gradient are compatible with PSP8 & up.
Extract .PspGradient to Gradients folder).
Extract .pspmask to Mask folder.
I make separate folders for each tutorial I try and extract remaining supplies to it.
Make sure your Layer Palette is open, if not, View/Palettes/Layers.
Set your Material Palette per screenshot.
Floodfill the transparent layer with the GRADIENT:
Selections/Modify/Contract: 25.
Selections/Invert.
Effects/Plugins/penta.com/jeans: Amount: 62, Border Width: 4 (default values).
Effects/Edge Effects/Enhance.
Effects/3D Effects/Drop Shadow: Vertical & Horizontal = 5, Opacity = 50, Blur = 10.00, Color = #000000.
(this gives a shadow inside the top and left sides).
Selections/Invert.
Effects/3D Effects/Drop Shadow: same values as above.
(this gives a shadow outside the bottom and right sides).
Selections/Select None.
Edit/Copy.
Edit/Paste as New Layer onto your working image.
Move it all the way over to the right, per the sample at top of page.
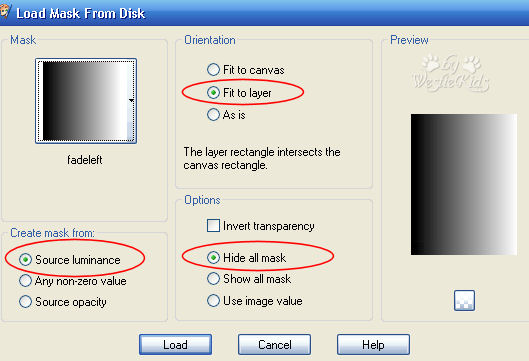
Layers/Load-Save Mask/Load Mask From Disk and find the fadeleft.pspmask then click Load button (see screenshot below for settings):
In your Layer Palette, change Opacity to about 60 (or to suit yourself); change Blend Mode from Normal to Multiply.
Edit/Copy.
Edit/Paste as New Layer onto your working image.
Move it all the way over to the left, per the sample at top of page.
I lowered the Opacity to 80 and left the Blend Mode as Normal, but again, it's your choice.
Click on Text Tool and type "Dream a little dream of me..." or a phrase of your choosing (see screenshot):
Change Opacity to about 70 and Blend Mode to Luminance (Legacy).
Effects/3D Effects/Drop Shadow: Vertical & Horizontal = 1, Opacity = 50, Blur = 1.00, Color = #000000.
Type "Tropical Dreams" or your name, etc. (see screenshot):

Selections/Float.
Selections/Modify/Contract: 1.
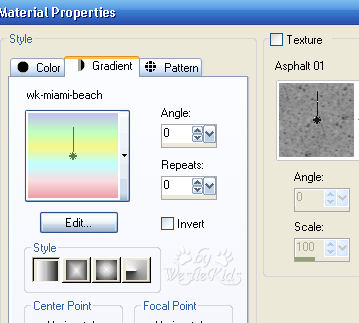
Open your Foreground and change to the wk-miami-beach Gradient and floodfill the selection.
Change Angle to 90 and check the Invert box (see screenshot):

Effects/Edge Effects/Enhance.
Effects/3D Effects/Drop Shadow: Vertical & Horizontal = 1, Opacity = 50, Blur = 1.00, Color = #000000.
Selections/Select None.
Add your watermark and your blend is complete! Thanks for trying Tropical Dreams Blend.
Westie Kids/Diana Dorsey 2001-2007
(all rights reserved)
Thank You and God bless........Diana